

Fix Windows cant Communicate with the Device or Resource ErrorPosted by Joseph C. Speller on December 21st, 2020 You just encountered an error stating: “Windows can’t communicate with the device or resource.” You had this all-important work to do online and now you are annoyed. Don’t worry. We have got you covered with our easy and step by step guide to fix this error. Without further ado, let’s dive into it. We have got 6 different solutions for you. Please note that you don’t have to try all 6 of them. If the first one works, stop there. If not, move on to the next one. Continue doing this until the error goes away. 1. Change Adapter (Wifi) SettingsMaybe your wifi setting is messed up and you don’t even know about it. To rule this out, let’s check these settings and ensure the right ones are selected. Follow the steps below to do this. Here is the step by step guide of method #1 in order to fix the windows can’t communicate with the device or resource (primary DNS server) Click on the control panel  Navigate to network and internet  Click on network and sharing center  Click on change adapter settings 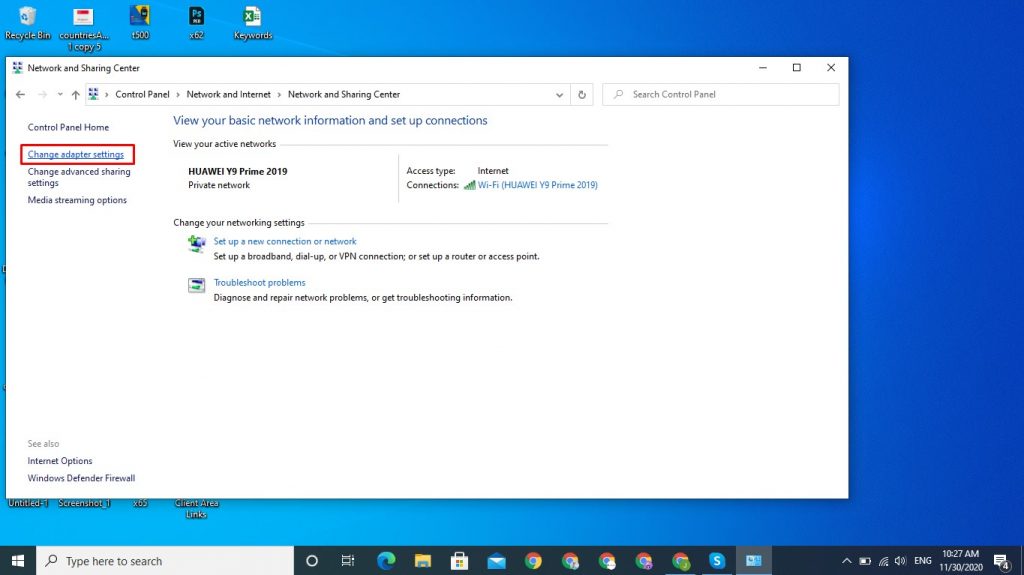 Right-click on the current network connection and select properties  Select properties of Internet Protocol Version 4 (TCP/IPv4)  Make sure the following are selected by default. If not, select them.
Click the Ok button 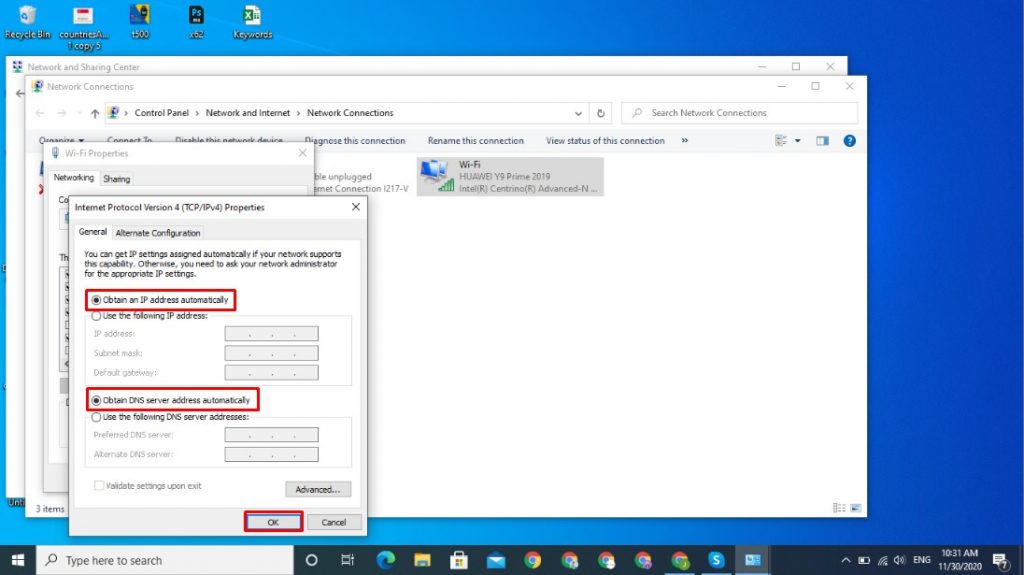 2. Update your DriverAnother cause of Windows can’t communicate with the device or resource error is outdated drivers. What to do about this? Update them manually. Here’s how: Update your driver manuallyGo to your vendor’s website (HP, Dell, Lenovo, etc) If you know the exact model of your network card then you can skip the product identification steps, otherwise here is the product identification process of HP (You can identify your product as per your vendor’s instructions.) Navigate to the product detect page and click on the Next button 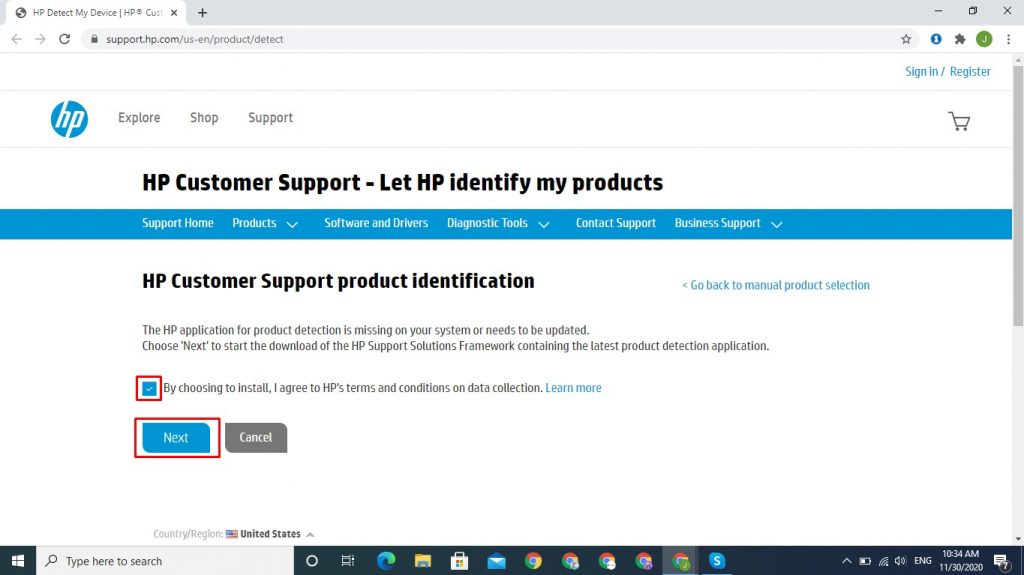 Read the installation instructions carefully and click on the Next button 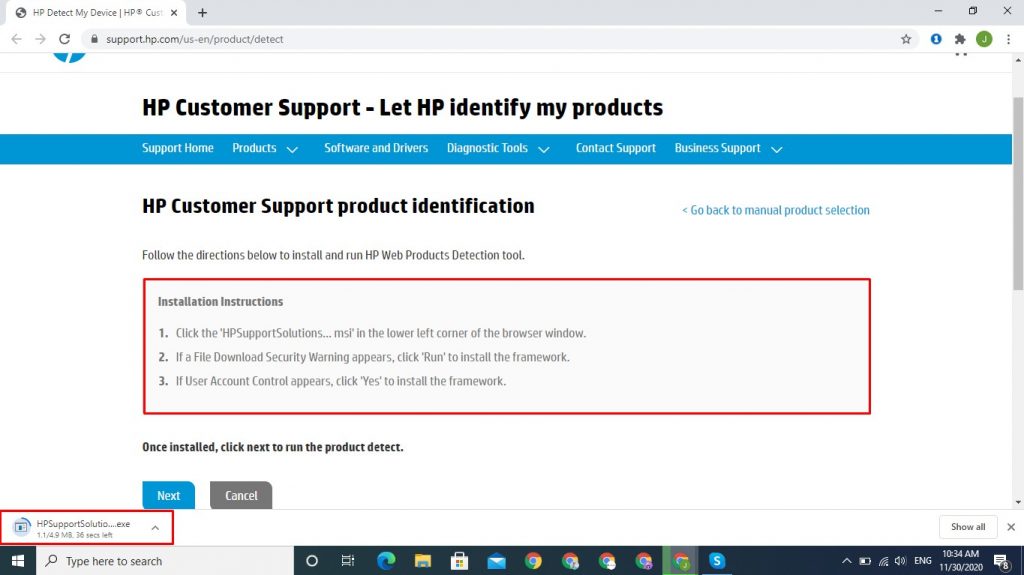 Open the downloaded file  Run and install the file 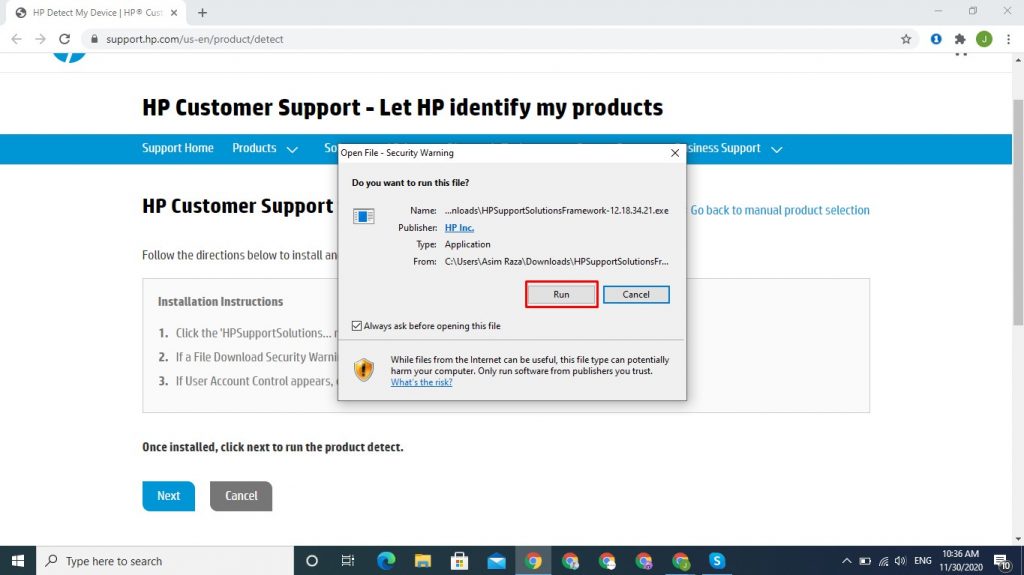 Click on the Next button 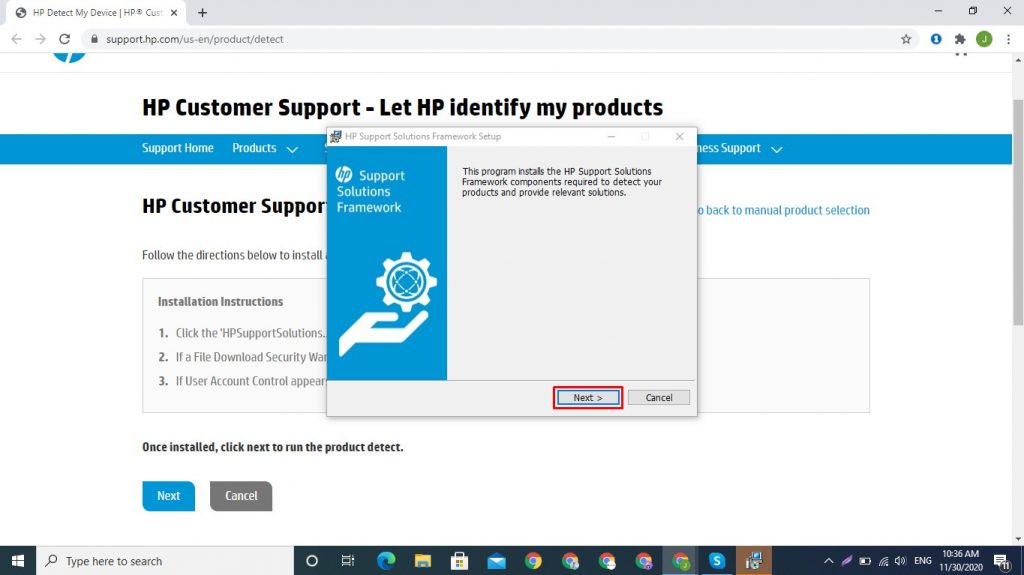 Click on the pop-up option “Open HP web product detection” 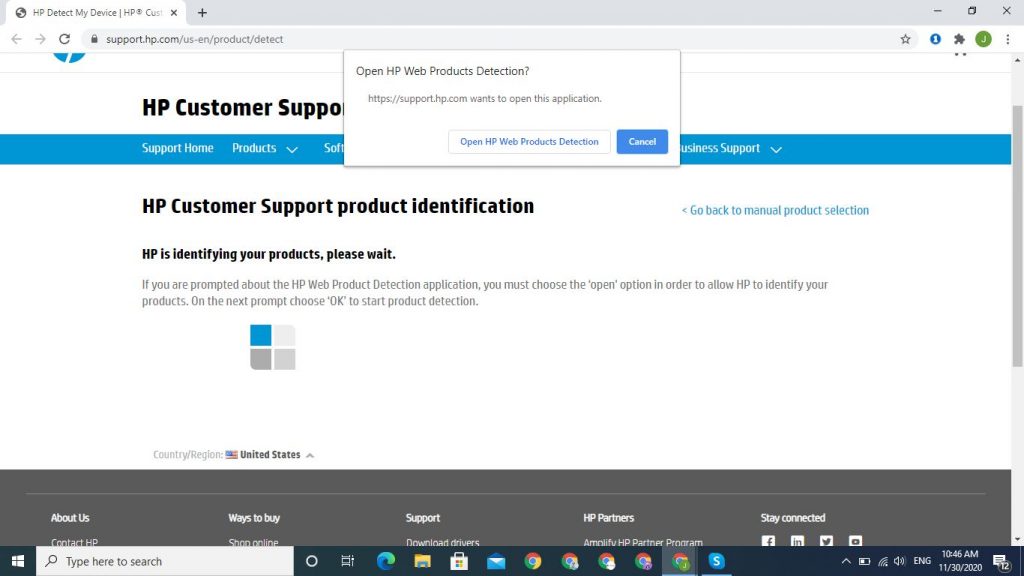 Click on the OK button and let the website initiate the product detection 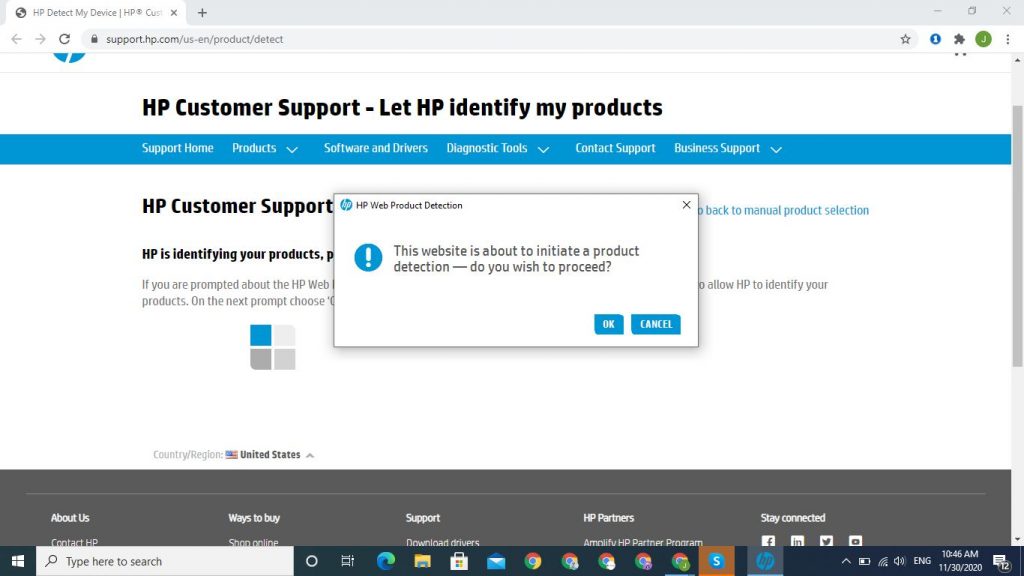 Your product is now getting identified 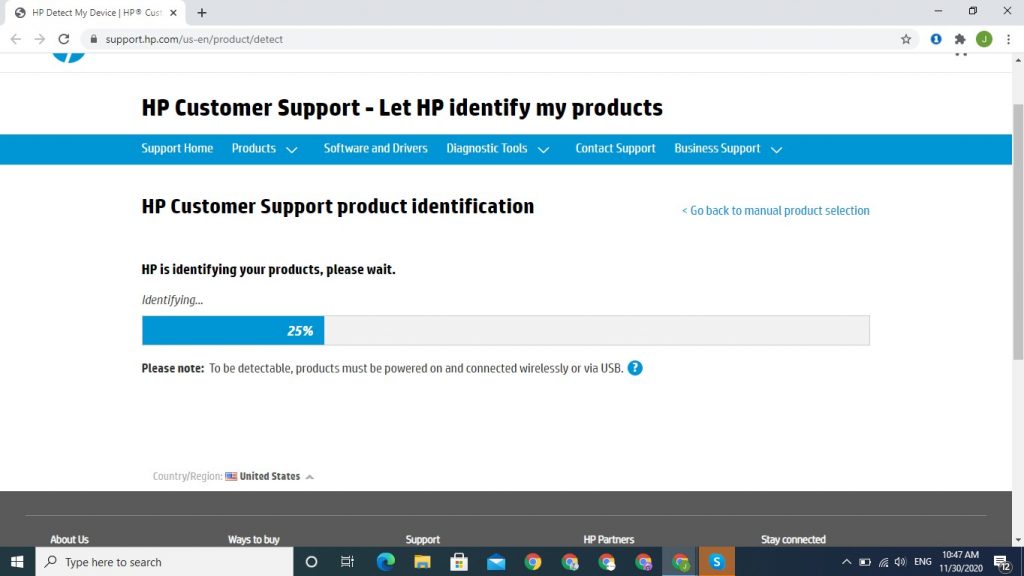 Finally you have found the name, serial number and product number of your computing device. Now, click on the serial number. 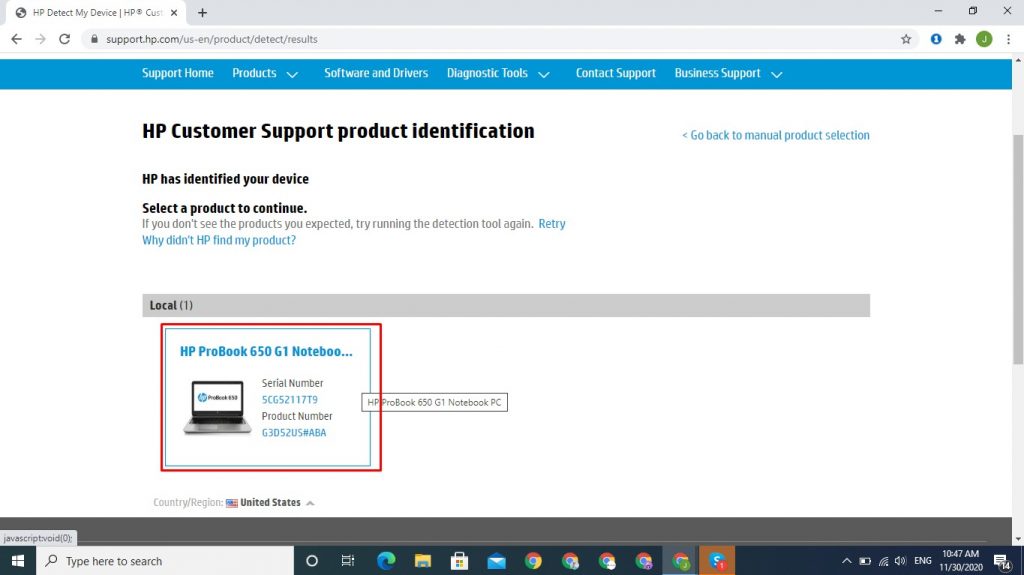 From the software and drivers, navigate to the Driver-Network section. 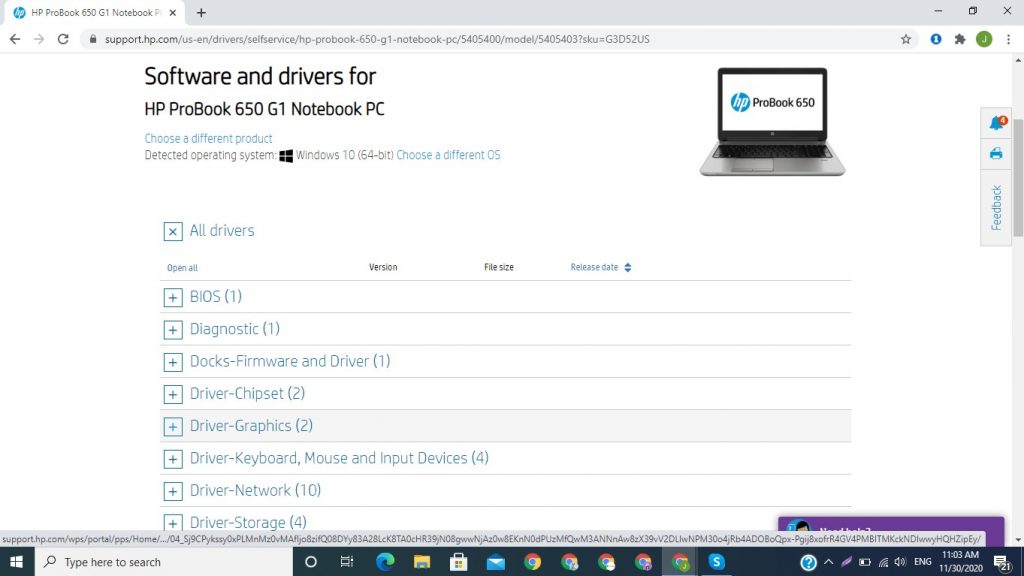 Download Wireless LAN and Ethernet drivers. 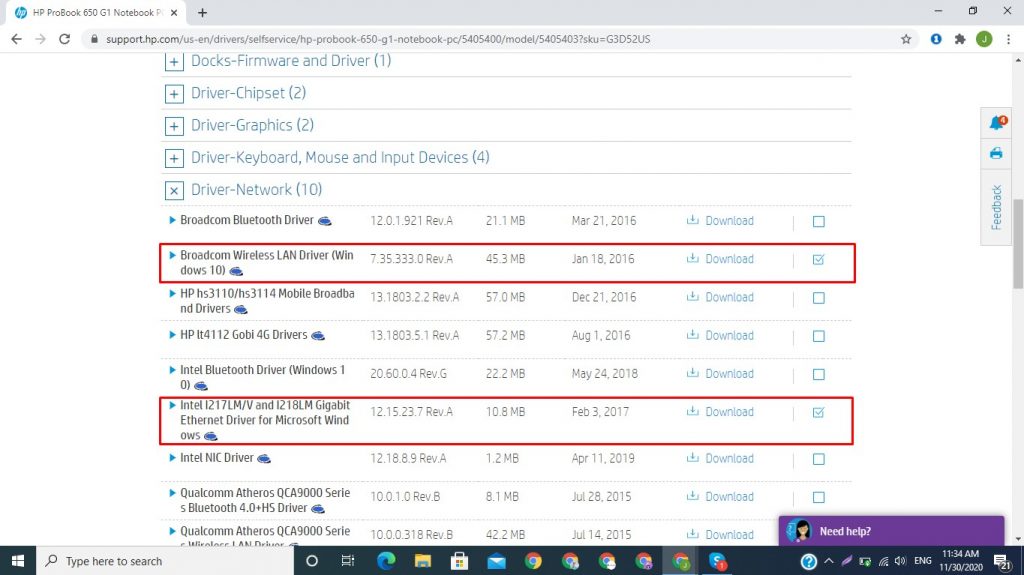 Driver is downloading 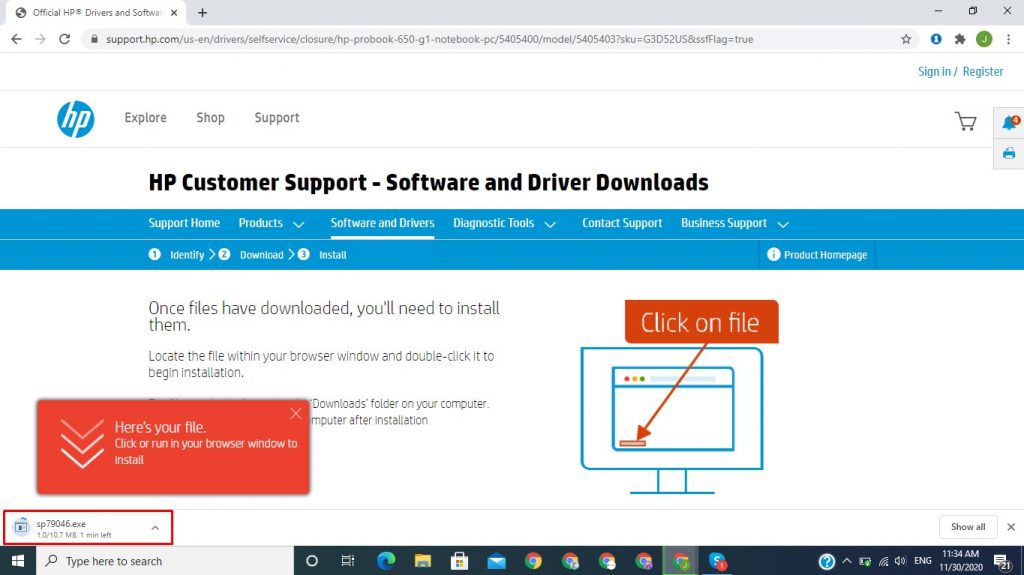 Click on the executable file and follow the installation steps 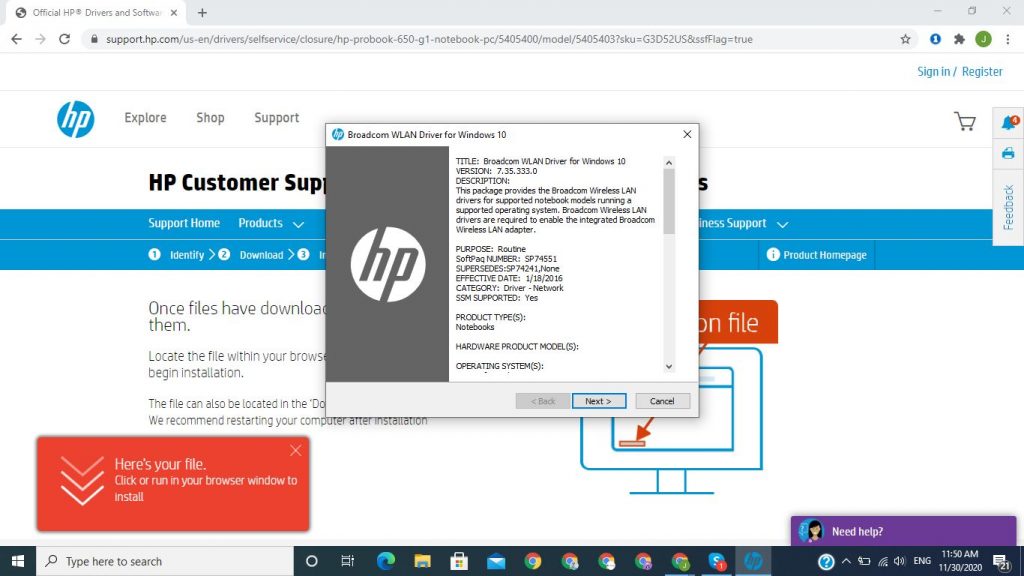 Accept the terms of the license agreement 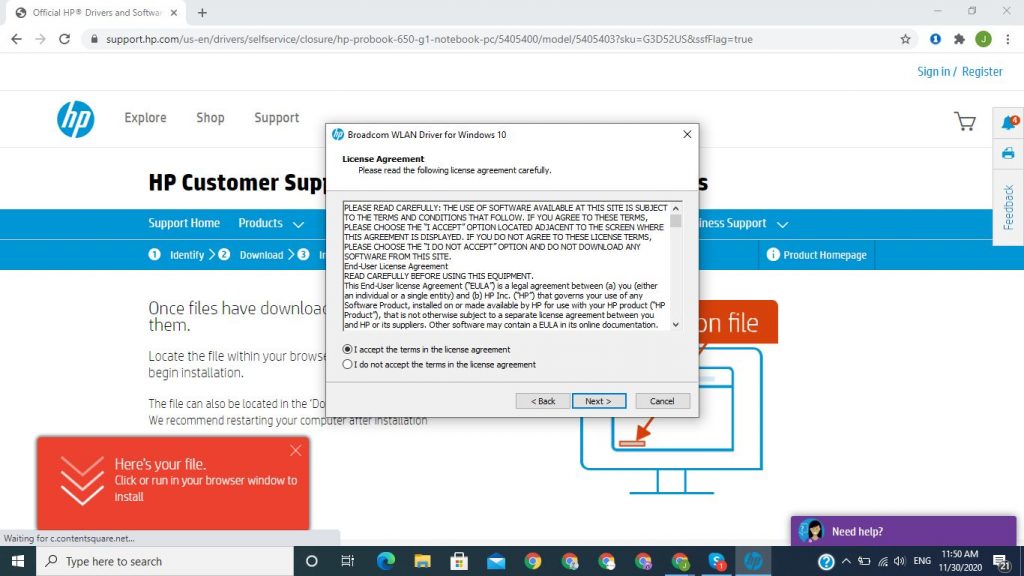 Choose the installation path and click on the Next button 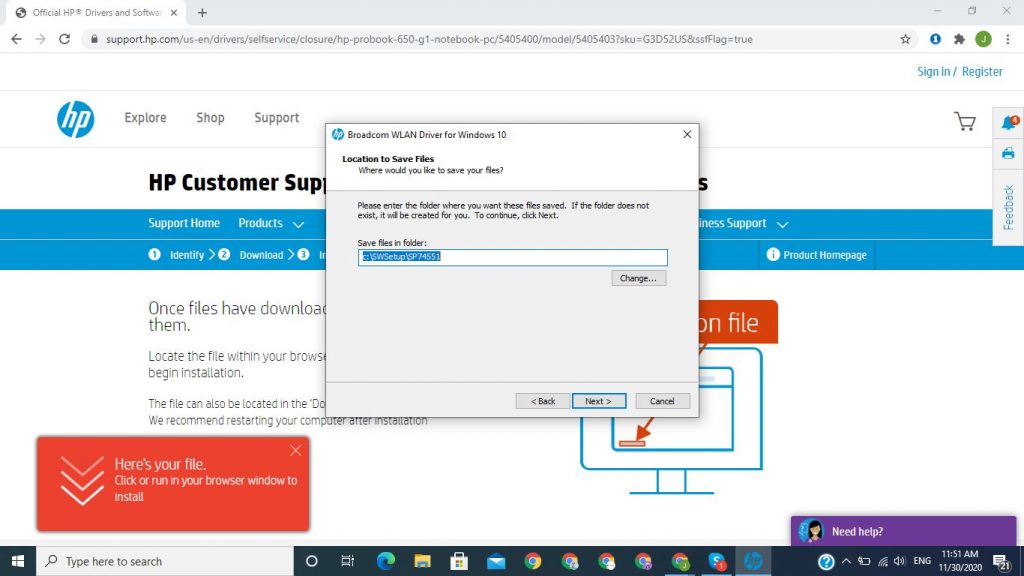 Update using built-in Device Manager toolPress the Windows logo + X and Select Device Manager 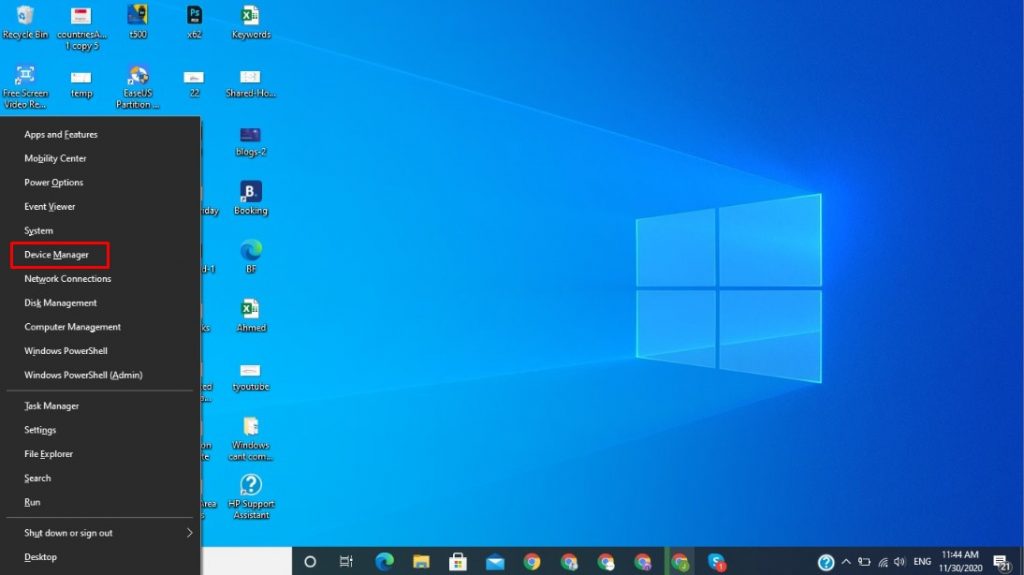 Now, locate your network device 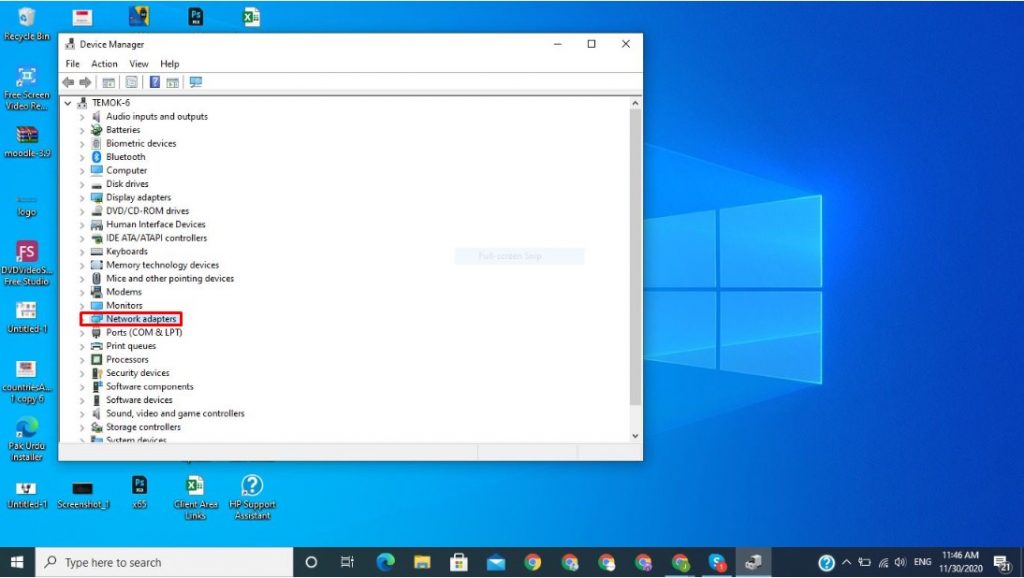 Right-click on it and choose to update its driver  Click on the search automatically for updated driver software 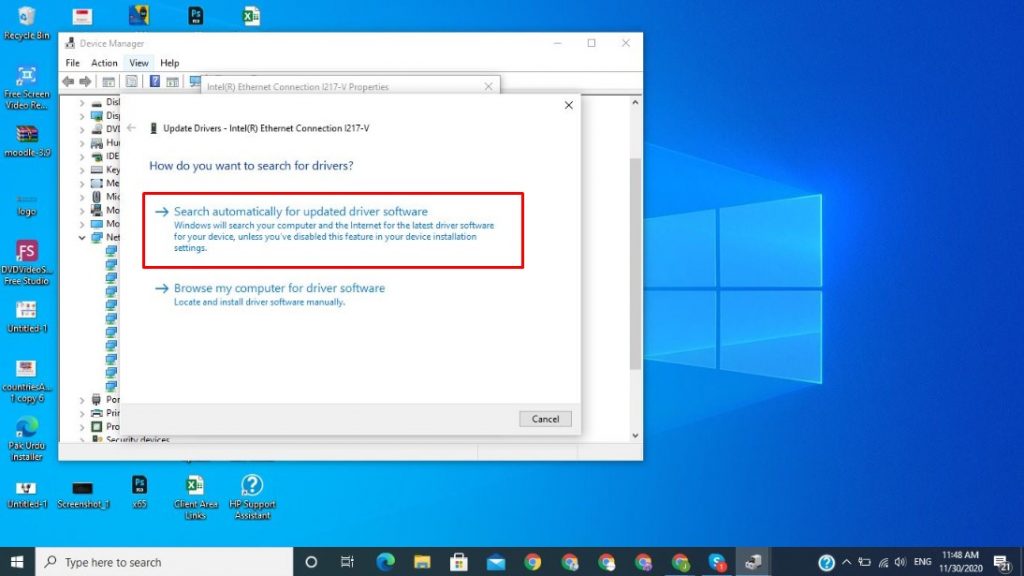 Device manager is searching online for drivers 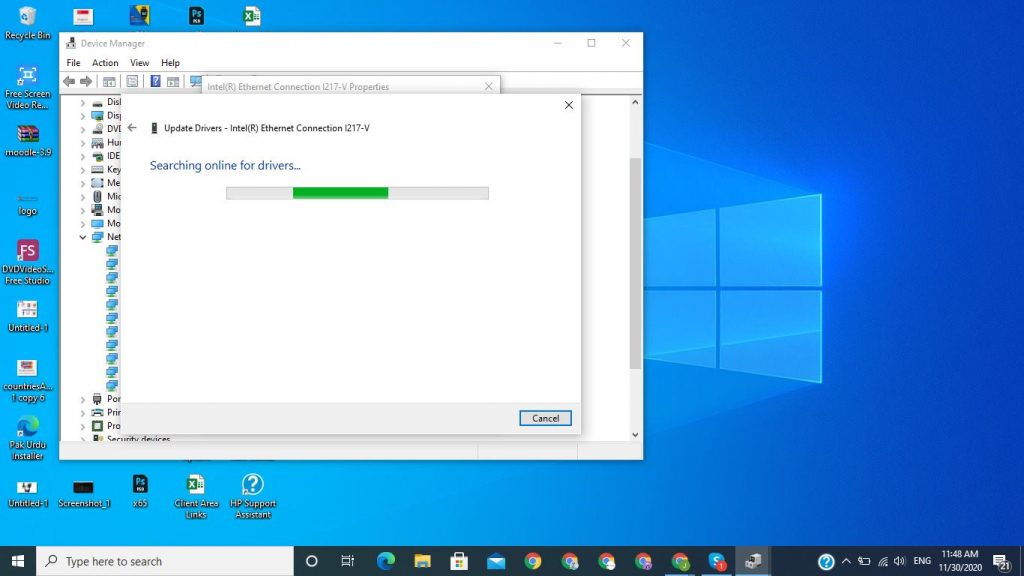 Windows has successfully updated your drivers 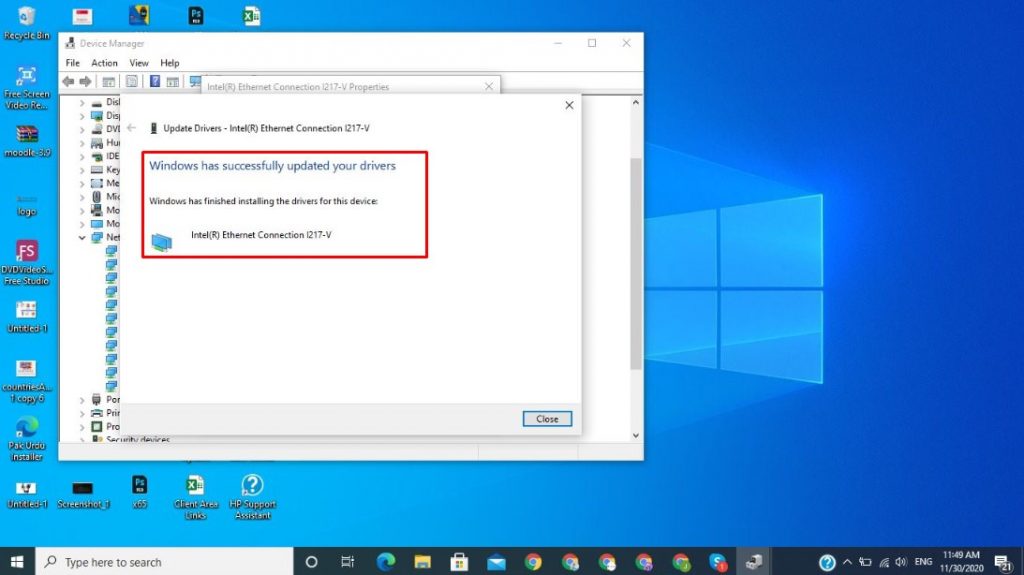 3. Check your Hosts FileProblem with the host file might be causing the Windows can’t communicate with the device or resource error to occur. To make sure everything is ok on this end, do the following: Go to system’s folder. Open Windows (C:) > Windows > System32 > drivers > etc and locate the file named hosts 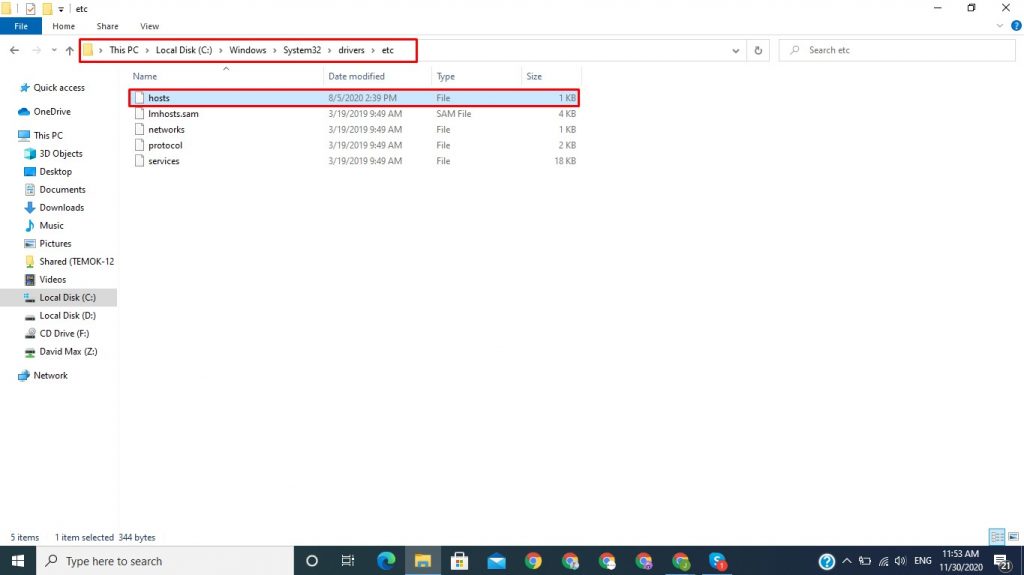 Double click on it. Windows will most probably give you a list of programs you can use to open this file. Use any text editor. By default, it’s notepad. 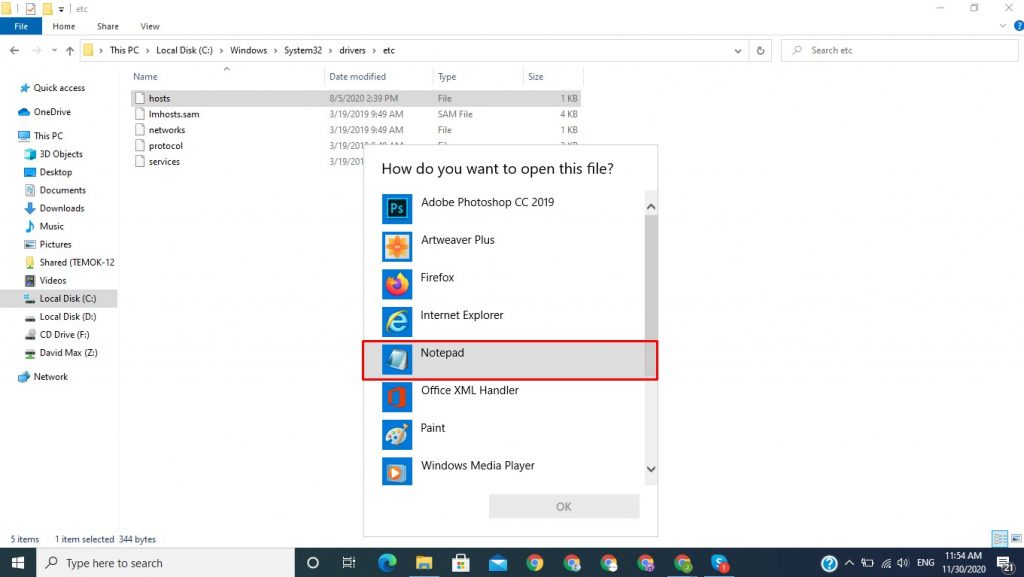 Once open, select all the text written in this host file by pressing Ctrl+A. Right Click on the text and select delete or make sure the website you’re trying to visit isn’t listed in there. 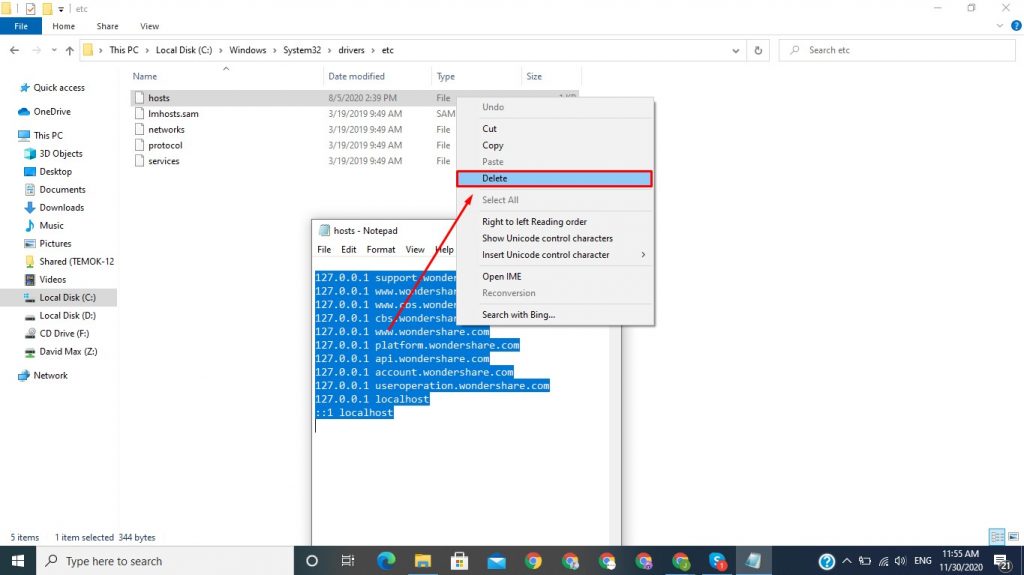 Now click the file and select Save. 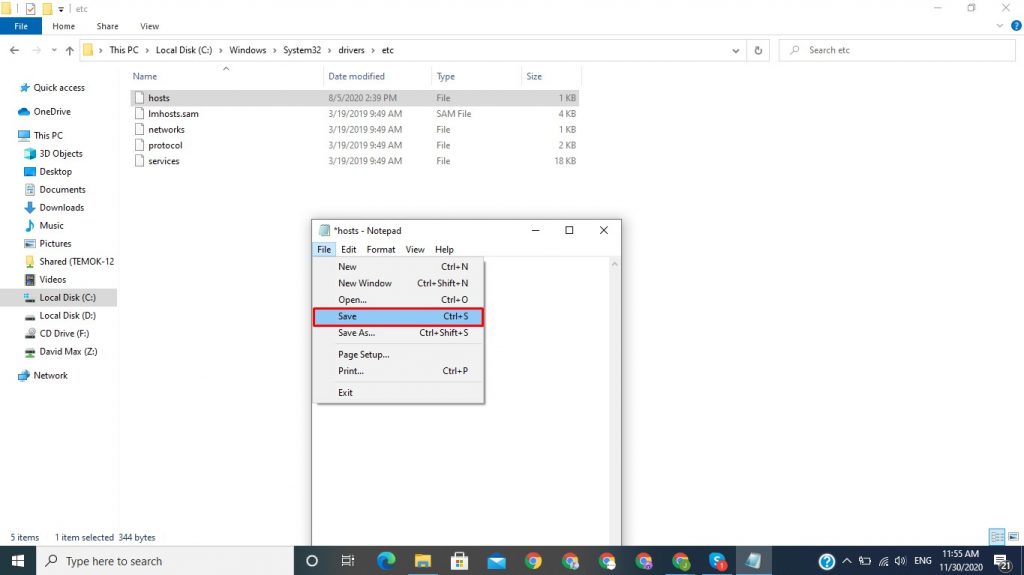 If prompted, select all files of this type. 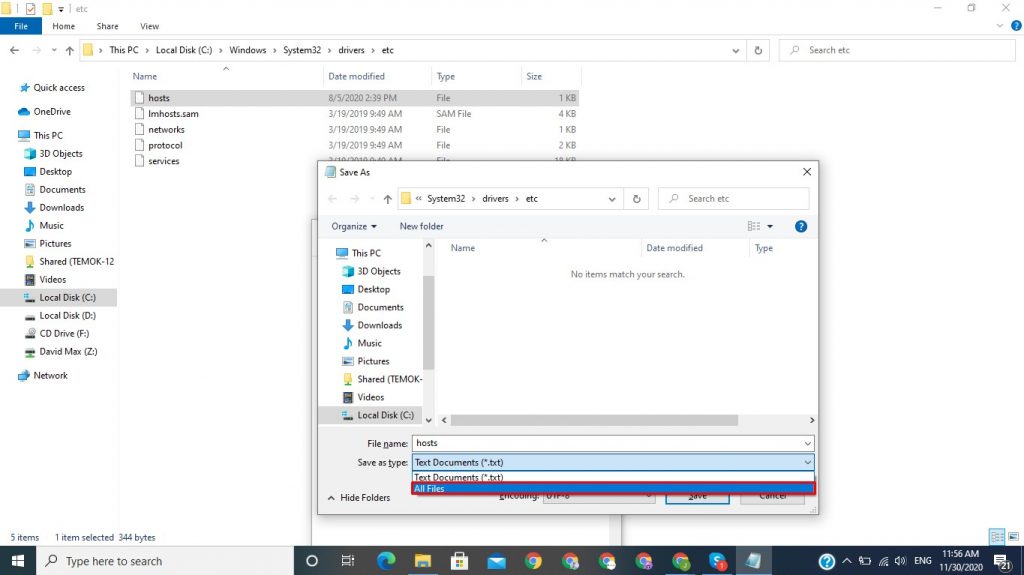 4. Change your DNSIf the problem still isn’t going away, it’s time to change your DNS as the error might be occurring because of that. We recommend switching to Google’s DNS. Follow these steps: Open your Control Panel  Similar to the steps above, click Network and Internet 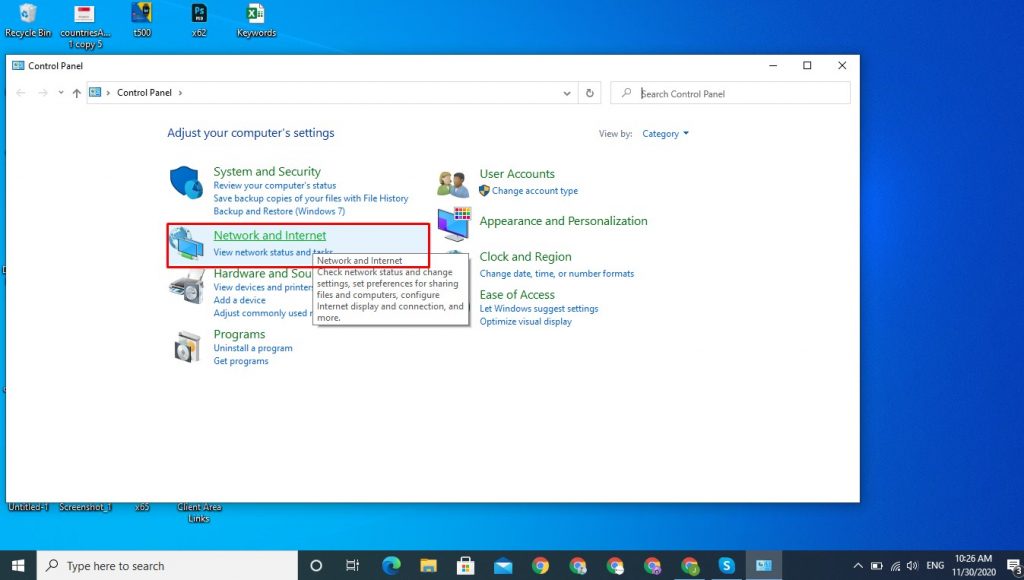 Click network and sharing 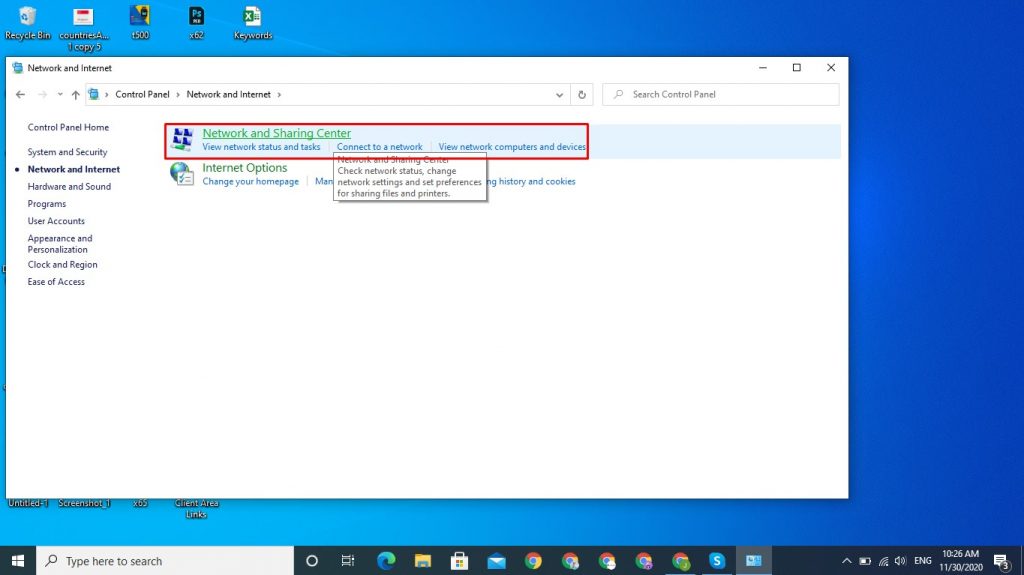 Click on change adapter settings  Click properties as shown in the image below 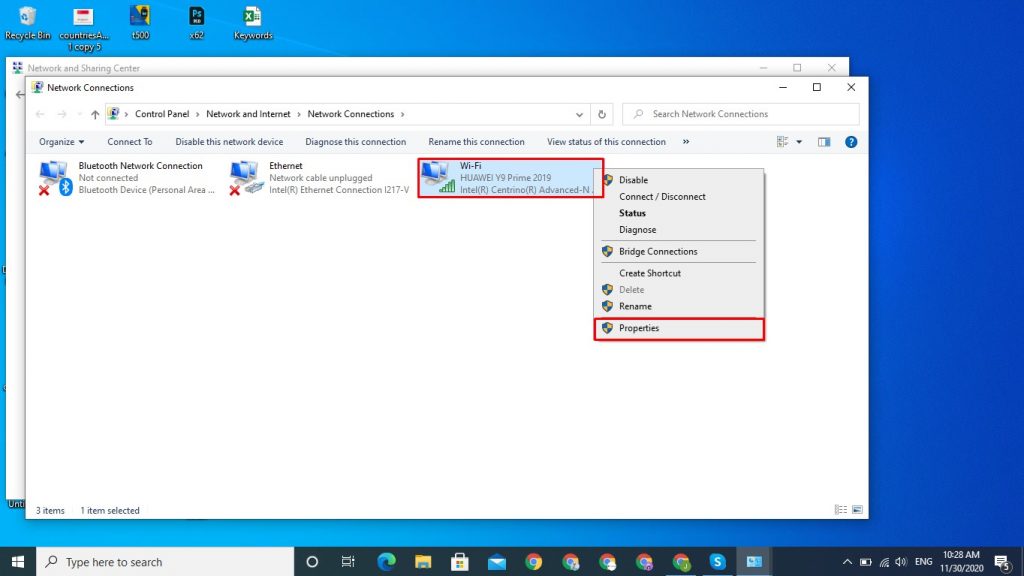 Click on internet protocol version 4. Once selected, click on properties 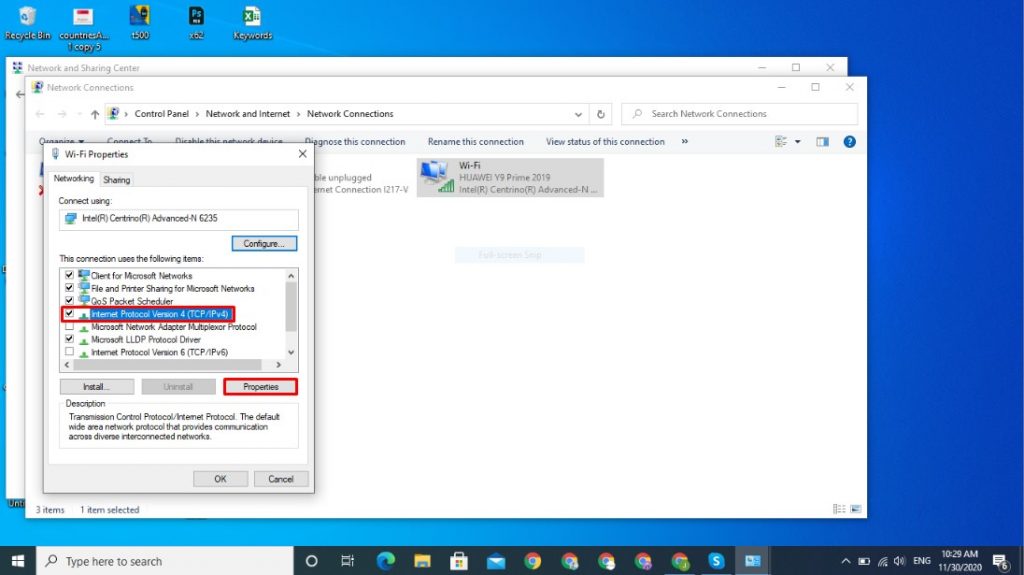 By default, the following option will be selected
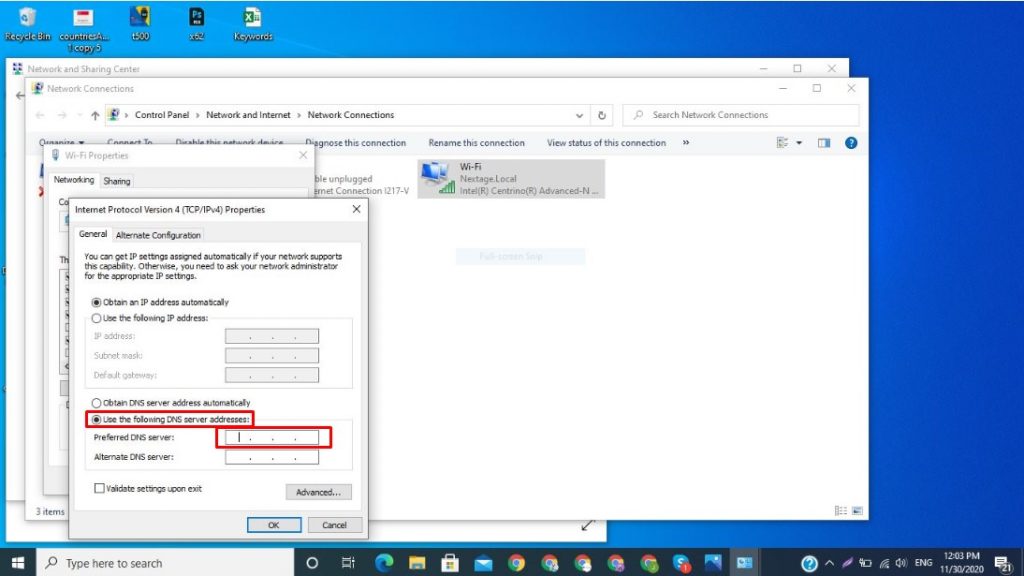 Look below it and you will see Use the following DNS server address. Click on that. In the preferred DNS server field, type: 8.8.8.8 Click ok and you are done.  5. Clear DNS CacheStill getting the Windows can’t communicate with the device or resource (primary DNS server) Maybe your DNS cache has problems. Time to clear them. Type cmd into the windows search bar Right click on the command prompt. Click Run as administrator 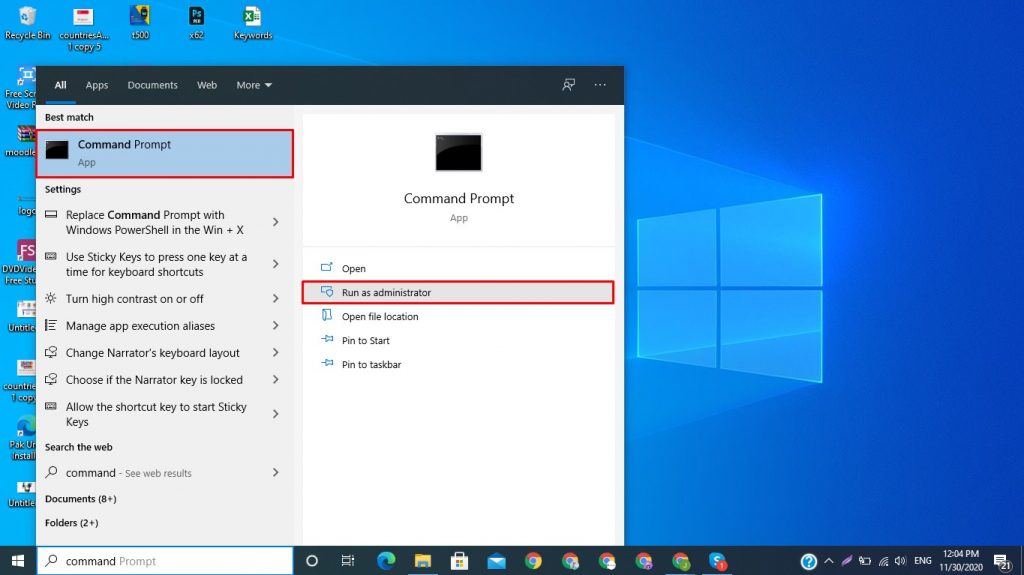 In front of C:\Windows\system32>, type ipconfig/flushdns and press the enter key. 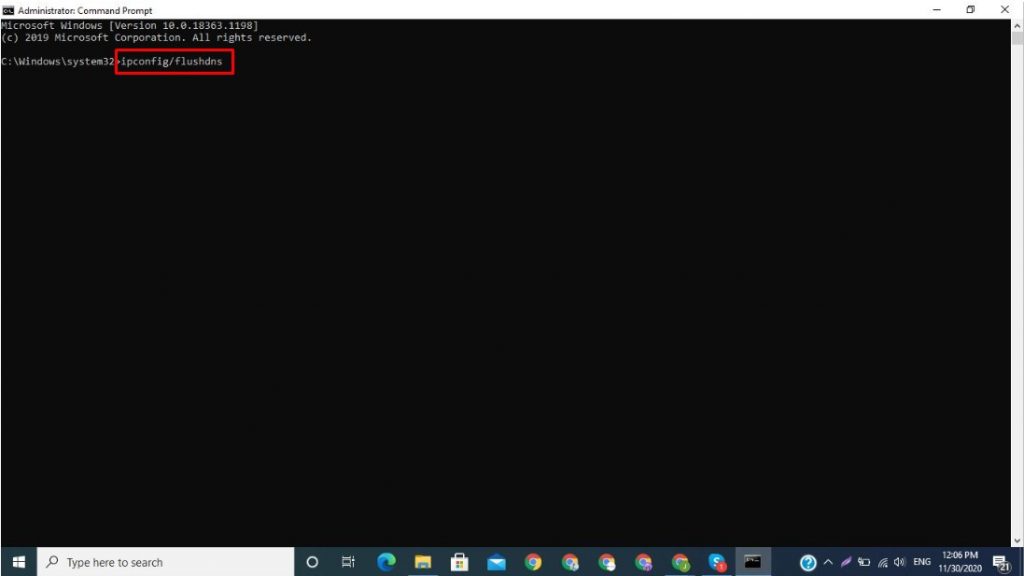 That’s it. Your DNS cache is now cleared. 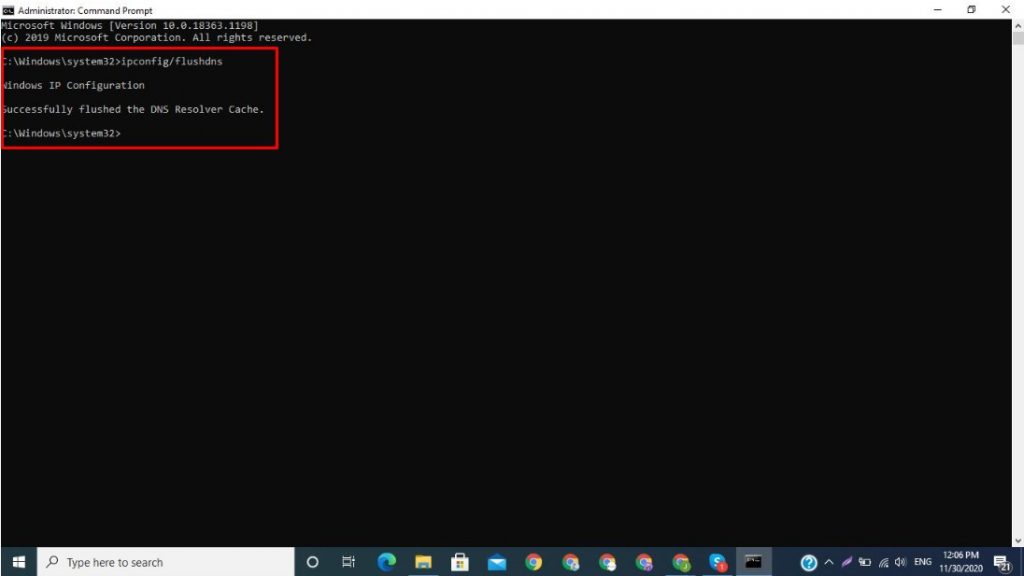 6. Run a Virus ScanIf the error is still there, maybe there is a virus preventing your system from connecting properly. To spot and get rid of that virus, follow these steps: Type settings in the windows search bar  Click on update and security 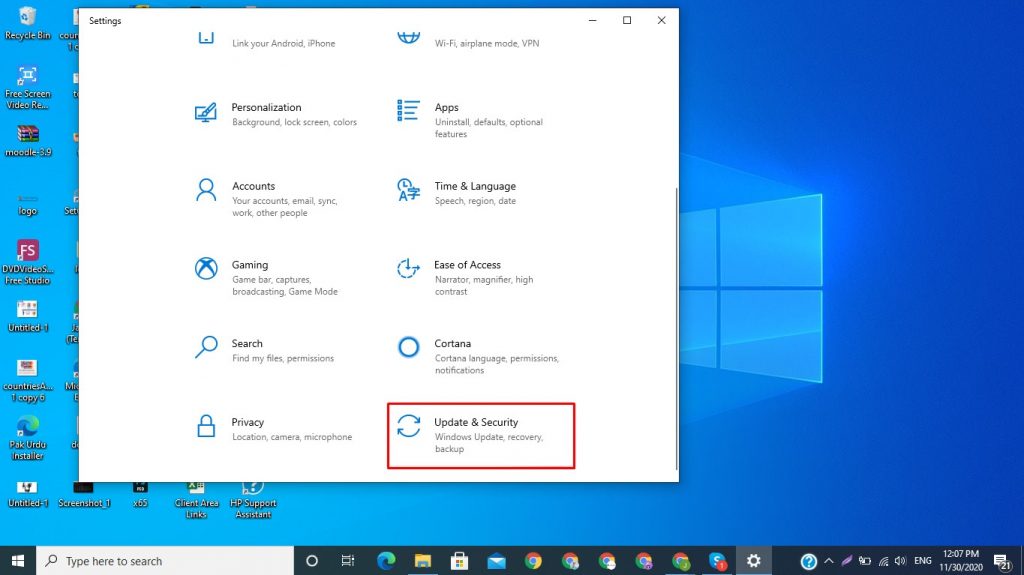 Click on windows security and select virus and threat protection 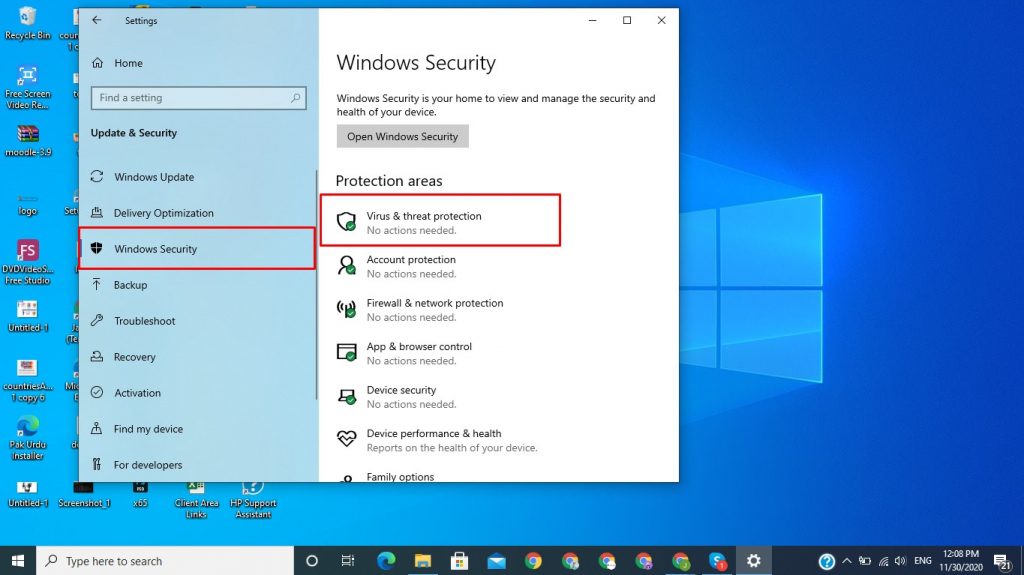 Click on run a scan options 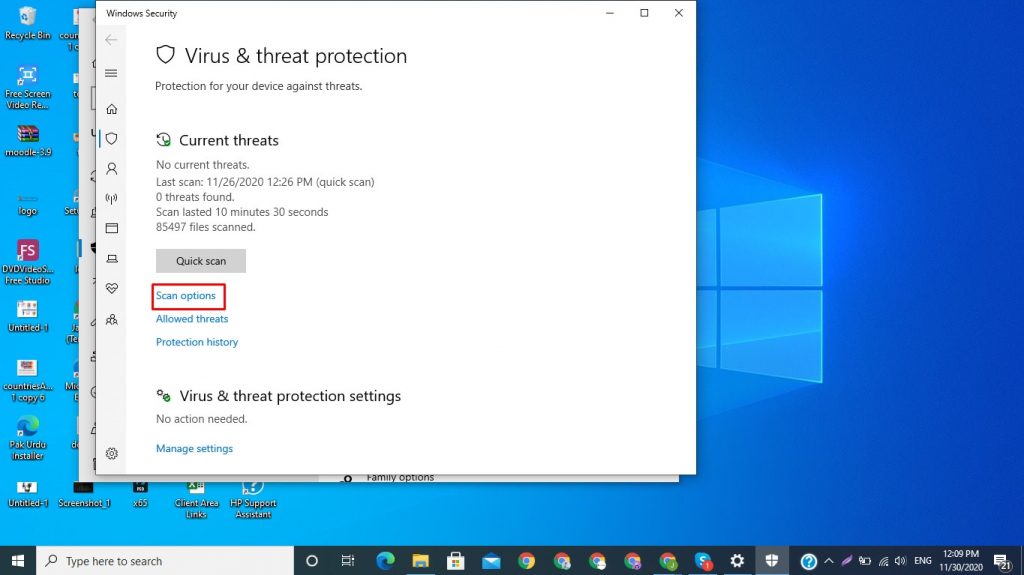 Select full scan and click scan now  You will see, the scanning of your computer has been started. 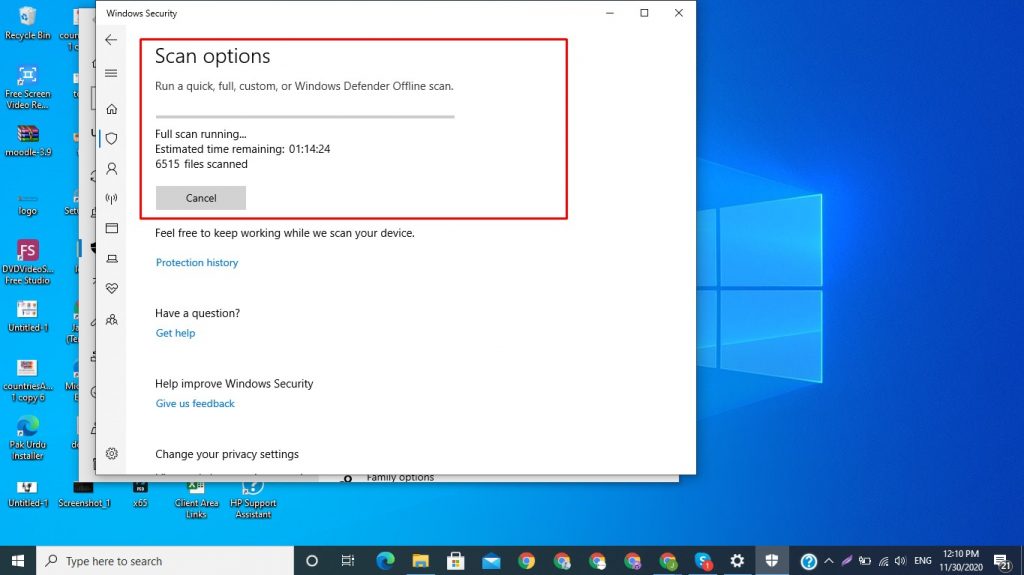 Like it? Share it! More by this author |