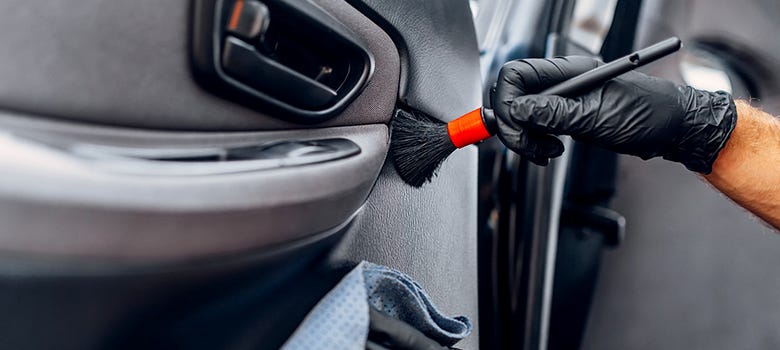
Twelve Stages to detailing your car or a truckPosted by Jennell on March 13th, 2021 Now that spring has occurred it's time to tidy and freshen up your automobile's interior and also safeguard various trim, plastics vinyl, leather fabric, carpets and glass. So I'm gon na reveal you how to do all that alright, so step number one is to declutter. So eliminate any undesirable items any garbage and remove the floor mats also. Step second: we're gon na clean up the flooring mats. So if they're rubber mats we're gon na initially start by washing them, then we're gon na spray, a degreaser or versatile cleaner. As you want, so you spray that liberally on the rubber mats and after that you brush them with a carpet brush if the mats are standard fabric mats first start by vacuuming the mats completely, then spray a carpet and upholstery cleaner straight on the mats, then scrub. The mats using a carpet and upholstery brush blot and wipe away the excess using a clean, microfiber towel step. Number three vacuum: the interior completely. So make sure you move the seats back and forth to get to all the covert nooks and crannies and also enter into the folds of the seats, whether they 'd be upholstery or leather seats. So step number four is to go on and dust. Your interior, consisting of the air vents, now to do so, you can use a soft bristle detailing brush like this one, in combination with your vacuum, so as you're dusting away make sure that you keep your vacuum near to select all that dust up, make sure you constantly Work from leading to bottom, due to the fact that the of course gravity acts on dust and it is up to the floor likewise for the air vents. Another cool trick that I have is the cyber tidy cleansing compound, so it's basically sort of a gel that likewise serves as an antibacterial. So it's antibacterial it molds to any surface, and I love this for infotainment screens, as it will assist you get rid of any dust before you go on and wipe with the tidy microfiber towel. So it will prevent the dust from making micro scratches on the infotainment screen or any interior trim that you have action number five utilizing a steam cleaner, we're gon na steam, clean the door, jambs and door sills, and we're gon na wipe clean with a microfiber towel. Now, if you don't have a steam cleaner, no worries, you can utilize a microfiber towel and an all-purpose, cleaner or a degreaser. It works fine also step number 6 we're gon na go on and clean the headliner. If you see any staining so you essentially apply an all-purpose, cleaner or a fabric and upholstery cleaner spray, it extremely gently directly on the tip of a soft bristle brush. You never want to spray those chemicals straight on the headliner since you wouldn't want to impact the glue that's holding the headliner to the roof. So you spray it on the pointer of your brush. You go on and brush the affected location and you obstruct and clean away using a tidy and dry microfiber towel step number 7: we're gon na clean the seats, whether they be upholstery or leather seats. Now, if you have upholstery, utilize a carpet and upholstery cleaner and if you have leather seats like I do, you can use G on leather, clean or any other premium leather, cleaner. You basically spray with a leather brush, so I utilize the swiss packs or color lock. Leather brush, Reno car detailing prices so these are bristles that are made specifically for use with leather, so really extremely mild, and after that you go on and brush the seats, always work from top to bottom and for the steering-wheel very same technique. So you spray on the bristles. You go on and you brush with the steering wheel and you wipe away with a clean microfiber towel. Okay, so step number 8, and now that the leather seats are tidy, we're gon na go on and secure them against the sun's damaging UV rays. Now you can utilize numerous forms of leather protectant. There are leather serums out there. There are leather conditioners, there are ceramic instilled leather finishings like this one from Jian. This is jian leather coat, it remains in a spray bottle, and you likewise have ceramic finishings for leather. I actually did a video tutorial on application of ceramic finishings for leather seats, so he can click the video up here. So basically you go on. You spray the product on your microfiber applicator pad and you carefully use the item on the leather surfaces. So if this is gon na help secure them and make them feel silky smooth too and likewise safeguard them versus staining and make them simpler to clean, okay, so step number 9 we're gon na proceed and clean up the interior, trims or plastics and vinyl using An all-purpose, cleaner or an interior cleaner of your option, so you basically spray using a microfiber, applicator pad or a microfiber towel, and you scrub to make certain you clean up the surface areas prior to we use it. The trim in another action, another quick tip, if you have some scuff marks in the bottom of the sill, so on those plastic door trims, you can go on and use a mr. Clean Magic Eraser. So you essentially spray a little your all-purpose, cleaner straight on the Magic Eraser and you gently scrub. You wipe away it with a microfiber towel which's it. The scuffs are gone. This is likewise a terrific trick. If you have some fingernail marks on the outside door handles so where the hands satisfy the door deal with, you can use a little lube, so your all-purpose, cleaner carefully scrub the way which need to get rid of the majority of the fingernail scratches on your door deals with fine, so Step number: ten: now that we've cleaned the interior trim, we wish to go ahead and secure it versus the sun's UV rays against fading cracking and aging also. We wish to restore that factory, appearance without a greasy residue. So to do so we apply a water-based trim dressing, so I like corporal Perle now this is a water-based silicon oxide finish. So, basically, you can use this straight out of the bottle to resolve your tires or dilute it one-to-one for tire dressing, but you can also dilute it one in five for usage as an interior trim dressing. So I made a quick dilution in a spray bottle. A little goes a long way you spray it directly on a microfiber applicator pad and you apply the dressing to your interior trim. So this is good for plastics, vinyl and rubber. Alright, so step number eleven is to apply a fabric protectant. Now you can apply a fabric protectant straight on your upholstery if you have fabric seats or, of course, on your carpets and flooring mats now these are usually water and stain resistant, so they're gon na help to eliminate some spills or some water that may be on Your seats or on your carpets and they're also frequently UV protectant, like this car, pro c-- quartz fabric. So you merely missed out on an extremely light coat because a little goes a long way. You'Ll, let it dry which's it. Your fabric is secured so step number 12. We want to assist deodorize the interior by utilizing an air freshener. So the sense of smell is one of human beings, many effective senses, and it's extremely important to give that final. Long lasting detail touch so we're going to proceed and spray an air freshener, but a fast suggestion to make this last longer is to make certain you turn your AC on to full blast put in an air recirculation mode and you're gon na spray. This in the foot wells near the air induction or the air consumption. So in this manner this is gon na enter into your AC system and it's gon na lightly coat the ducts. So, each time you switch on your vehicle and you turn on the A/C you're gon na get a blast of fresh odor, so that's quite cool. In this case, I used Chemical Guys honeydew. This is a fantastic smelling air freshener and order neutralizer, but you can use any air freshener of your taste, so step number thirteen and the last step, but probably among the most crucial we always keep. This last is to clean glass. So when you're completed detailing the interior, you want to make sure that your glass is incredibly gleaming tidy and to do so, I'm gon na provide you professional pointers so, to start with, you're going to use mr. Clean Magic Eraser and an all-purpose, cleaner, so you're gon Na spray, the all-purpose, cleaner directly on your mr. Clean Magic, Eraser and after that you're going to go on and clean the interior part of your glass. By doing this, you're gon na remove any pollutants or any grease or oily residues that have existed with time. If you do not have a versatile cleaner, you can likewise utilize an IPA wipe down like our pro eraser or Jian prep, so an isopropyl alcohol mix. This will assist to get rid of any oily residues or fingerprints. So it's gon na make your glass squeaky clean. Next, up we're gon na utilize a premium glass: cleaner, that's ammonia, free, so safe for tinted glass, something like stoner's undetectable glass. So I spray this on a waffle, weave, microfiber towel, and then I go ahead and wipe the glass to remove any streaks and leave a streak free surface that method. Your automobile and your windows are now totally prepped and, as a last final touch, that makes all the difference. You can go on and spray a quick wax like McGuire's synthetic Express spray wax. Now you men will know that. I like to complete the outside glass with this, however I also use it on the interior parts of the windows, so it provides an extra shine and pop and makes glass cleaning a lot easier in the future. So you basically spray this on and dry and tidy microfiber towel. You apply it directly to the glass you flip the towel over and you rub clean which's it you men are gon na have super clean and shimmering Glarus so guys I always make it easy.
Like it? Share it! More by this author |