

How to Connect a NAS Server to an Xbox 360Posted by Kiara Taylor on March 9th, 2023 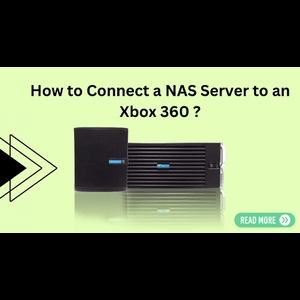 Network Attached Storage (NAS) servers are becoming increasingly popular as people look for ways of storing and streaming media. With the ever-growing library of content available on the Xbox 360, gamers can benefit from having a NAS server connected to their console. This guide will walk you through the steps of connecting your NAS server to an Xbox 360. What is NAS Storage?Network Attached Storage refers to any type of storage device that connects directly to a network rather than being connected directly to a computer or other device. It allows users to access files, programs, and data stored on the device from any location. This makes it an excellent choice for gamers who want easy access to their game files without having to transfer them manually every time they want to play a game. Step 1: Set Up Your NetworkThe first step is to make sure your network is properly set up. You'll need a router, a modem, and a network cable. Make sure your router is connected to your modem and that both are turned on. Then, connect your Xbox 360 using the network cable. Once everything is in place, turn on the Xbox 360 and check for any errors or warnings. This will ensure that the connection between the console and the router works properly before you go any further. Before you can connect your Xbox 360 to a NAS server, you need to have the server set up correctly. The first step is to install the software that comes with your NAS device. This will allow you to configure the settings of the server and ensure that it is ready for connection with other devices. If you're using a popular brand like Drobo or Synology, there are plenty of online tutorials available that will walk you through this process. Step 2 - Access Your Data On Your ConsoleNow that everything is connected properly, it's time to start accessing data stored on your NAS server from your console! The first step is to launch the Media Player app on your Xbox dashboard (if it isn't already installed, download it from the Store). Once open, select "Add Device" at the top of the screen and then enter whatever login information was provided when setting up your device initially. After entering this information correctly, select “Done” and then navigate back into Media Player where all of your files should be listed under “Devices” in an easy-to-browse format! Step 3 - Locate Your IP Address SettingsThe first step in connecting your NAS server to the Xbox is finding your IP address settings. This information can be found in the settings menu of your console. Once you have located it, make sure you write down both the “IP address” and “Subnet Mask” as these will be necessary for setting up your connection. Once your NAS device is properly configured and connected to your network, the next step is to connect your Xbox 360 console. You'll need an Ethernet cable for this step, so make sure you have one handy before proceeding. Once connected, open the Settings menu on your Xbox 360 dashboard and select "Network Settings." From here, select "Configure Network" and then choose "Network Settings." Select "Wireless" if you're connecting via Wi-Fi or "Wired" if using an Ethernet cable. Follow the instructions provided in order to complete the connection process between your console and network. Step 4 - Configure Your Network SettingsOnce you have written down your network settings, you need to configure them so that they match those of your NAS server. To do this, go into the settings menu and select “Network Settings” followed by “Configure Network” and then choose “Manual” from the list of options presented. Once here, enter in all the details that you wrote down earlier and save them when finished. Step 5 - Connecting Your NAS ServerNow that your network settings are configured, it’s time to connect your NAS server to the Xbox 360. To do this, simply plug one end of an Ethernet cable into the back of your console and then connect the other end into a port on your router or modem which is linked up with your NAS server. Once plugged in, turn on both devices and wait for them to detect each other – this should take no more than a few seconds depending on how many devices are connected at one time. Now choose "Custom" as your connection type and enter in the IP address of the NAS server into the provided field. When prompted for a username and password, enter in whatever credentials were used when setting up the device originally (these may vary depending on what kind of device you have). Now click "Done" and wait for your console to detect it successfully! Congratulations - now you know how to connect a NAS server to an Xbox 360! Conclusion:Connecting a Network Attached Storage (NAS) server to an Xbox 360 is relatively simple once you know how it works! The first step is locating your IP address settings found in the console's settings menu followed by configuring those same settings manually within that same menu before finally connecting everything together with an Ethernet cable. With all these steps complete, you should now be able to enjoy streaming media from your NAS directly onto your Xbox360! Connecting a NAS server to an Xbox 360 requires a few steps but overall it’s a relatively straightforward process that anyone with basic computer knowledge can accomplish in no time! With this setup in place, gamers can now access their media library directly from their console and enjoy all kinds of content without any hassle whatsoever! So don’t hesitate; take advantage of this awesome opportunity today by following our guide above and connecting your Xbox 360 with a Network Attached Storage. Connecting a Network Attached Storage (NAS) server to an Xbox 360 is surprisingly easy! All it takes is setting up your network correctly, configuring your NAS server with its own IP address so it can communicate with other devices on the LAN, and entering in some credentials when prompted by your console during setup. With just these few steps, you'll have all of your media files accessible from both devices at once - no more transferring files manually! For developers and gamers alike who need quick access to their data stored across multiple platforms – Contact us to know more!
Like it? Share it! More by this author |